How to install Portainer with Docker Compose v2
More about this article
Quick summary
- Portainer CE, the open-source Docker container management UI, installs with Docker Compose v2 using a single 15-line `compose.yaml` with no `version:` key.
- Pin the image to `portainer/portainer-ce:2.40.0` instead of `:latest` to control exactly when the server is updated.
- The named volume `portainer_data` keeps users, endpoints, and configuration intact across upgrades with no data loss.
- The Docker socket is mounted read-only (`:ro`) because Portainer manages containers via REST API and needs no write access to the host socket.
Key concepts
- Prerequisites: Docker Engine 24+ with the bundled `docker compose` plugin, sudo access, and port 9443 free.
- Prepare compose.yaml: A 15-line file with a pinned image, named volume, and read-only Docker socket mount.
- Launch the container: A single `docker compose up -d` starts Portainer with HTTPS on port 9443.
Useful links
Actualizado: 2026-05-16
Portainer[1] is the reference web UI to manage Docker containers, Compose stacks, and Swarm/Kubernetes clusters. CE edition 2.40 STS includes native Docker Compose v2 support, HTTPS by default on port 9443, and a unified panel for Docker Engine, Swarm, Kubernetes, and ACI resources.
This guide installs Portainer CE with Docker Compose v2 on a modern Debian/Ubuntu server (Ubuntu 24.04 LTS / Debian 13 Trixie), using a compose.yaml file and the official docker compose plugin (no dash, bundled with Docker Engine 20.10+).
Key takeaways
- Use
compose.yaml(noversion:key) instead of the olddocker-compose.ymlwith explicit version. - Pin the image (
portainer/portainer-ce:2.40.0) instead of:latestto prevent silent major upgrades. - The named volume (
portainer_data) simplifies backups and updates. - The Docker socket is mounted read-only (
:ro): Portainer doesn’t need direct socket write access. - The first-access form expires in 5 minutes: have everything ready before opening the browser.
Prerequisites
Before starting, you need:
- Server with Docker Engine 24+ installed (includes the
docker composeplugin by default). See the official Docker docs for Debian[2] or Ubuntu[3]. sudoaccess or user in thedockergroup.- Port
9443free for the HTTPS UI and, optionally,8000for the Edge Agent Tunnel.
Prepare compose.yaml
Create the working directory and configuration file:
mkdir -p ~/docker/portainer
cd ~/docker/portainer
nano compose.yaml
Recommended content:
services:
  portainer:
    image: portainer/portainer-ce:2.40.0
    container_name: portainer
    restart: unless-stopped
    security_opt:
      - no-new-privileges:true
    ports:
      - "9443:9443"   # HTTPS UI
      - "8000:8000"   # Edge Agent tunnel (optional)
    volumes:
      - /etc/localtime:/etc/localtime:ro
      - /var/run/docker.sock:/var/run/docker.sock:ro
      - portainer_data:/data

volumes:
  portainer_data:
Differences from older guides worth knowing:
- No
version:key. The Compose Specification has ignored it since 2023; today it’s redundant and generates warnings in some versions. compose.yamlfilename preferred overdocker-compose.yml(both work, but the new one is the official standard).- Image pinned to
2.40.0, not:latest. Pinning prevents surprises from silent major upgrades when the host runs a pull. - Named volume (
portainer_data) instead of bind-mount. Managed by Docker directly and easier to back up with tools like restic[4] ordocker cp. - Docker socket read-only (
:ro). Portainer controls everything via API, it doesn’t need direct host socket write access.
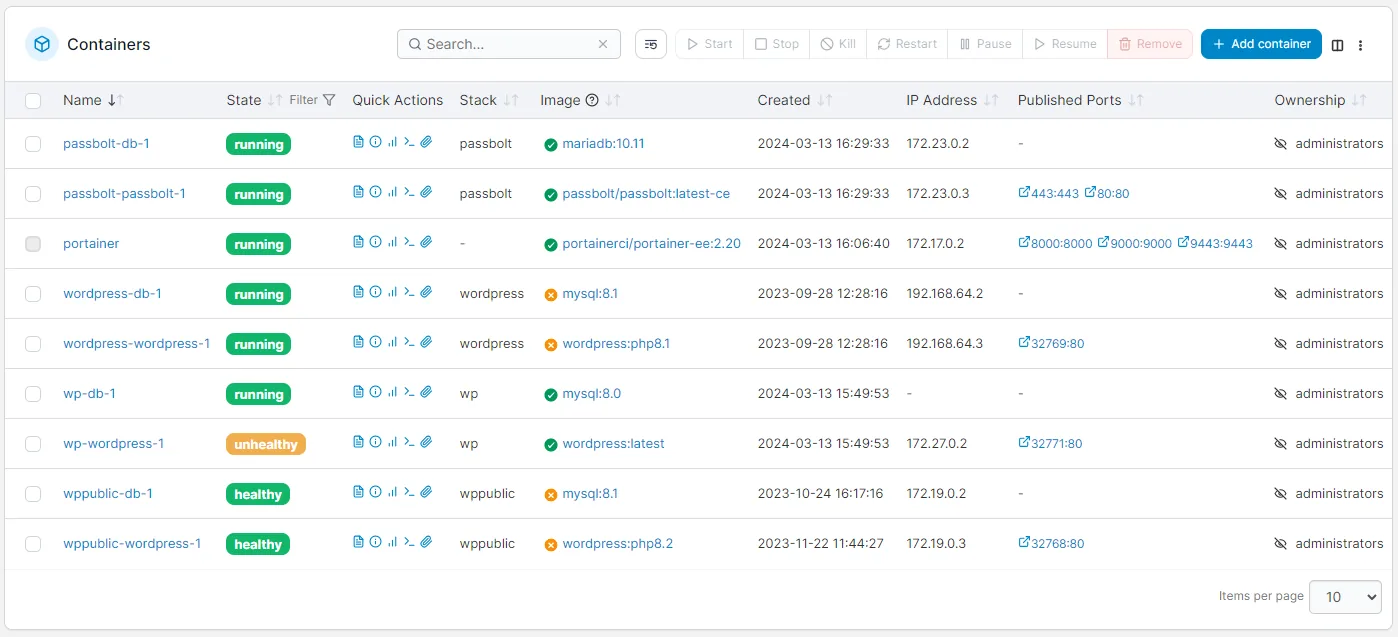
Portainer CE admin panel showing the list of running Docker containers
Launch the container
With the compose.yaml file in place, start Portainer in the background:
docker compose up -d
docker compose ps
You’ll see a portainer container running and listening on 0.0.0.0:9443. If the docker compose command doesn’t exist, make sure you’re using Docker Engine 20.10+ with the integrated plugin, not the legacy docker-compose (with a dash).
First access
Open in your browser:
https://<IP-or-domain>:9443The first time it will ask you to create the admin user with a minimum 12-character password. The form expires 5 minutes after the container starts, if you take too long, restart with docker compose restart and come back.
Because the HTTPS certificate is self-signed on first install, your browser will warn about a “not private” connection. That’s normal; click “Advanced → Continue” to proceed. For production, place Portainer behind a reverse proxy such as Traefik[5] with automatic Let’s Encrypt (see below).
Upgrading Portainer
Upgrading Portainer is safe because the portainer_data volume persists users, endpoints, and configuration across versions:
# 1) Edit compose.yaml and change the tag (e.g. 2.40.0 -> 2.41.0)
# 2) Pull + recreate:
docker compose pull
docker compose up -d
# 3) Clean up old image (optional):
docker image prune -f
The volume guarantees the upgrade doesn’t lose data. If something goes wrong, simply edit the tag back to the previous value and run docker compose up -d again.
Exposing Portainer via Traefik (optional)
If you already have Traefik as ingress with the traefik_public network defined, add labels to the service and drop the port mapping. When Traefik terminates TLS for you, the internal port is 9000 (HTTP), not 9443:
services:
  portainer:
    image: portainer/portainer-ce:2.40.0
    restart: unless-stopped
    networks: [traefik_public]
    volumes:
      - /var/run/docker.sock:/var/run/docker.sock:ro
      - portainer_data:/data
    labels:
      - traefik.enable=true
      - traefik.http.routers.portainer.rule=Host(`portainer.example.com`)
      - traefik.http.routers.portainer.entrypoints=websecure
      - traefik.http.routers.portainer.tls.certresolver=letsencrypt
      - traefik.http.services.portainer.loadbalancer.server.port=9000
      - traefik.http.services.portainer.loadbalancer.server.scheme=http

networks:
  traefik_public:
    external: true

volumes:
  portainer_data:
With this configuration, Traefik manages the TLS certificate with Let’s Encrypt and Portainer is accessible at https://portainer.example.com without non-standard ports. The same pattern applies to any additional service you deploy, see how to install local MCP servers as an example of a complementary service.
Conclusion
The modern Portainer install with Compose v2 is cleaner and more robust than guides from three years ago: a 15-line compose.yaml, pinned version, HTTPS by default, and persistence in a named volume. For multi-node environments, Swarm or Kubernetes, Portainer adds the same UI on top of the cluster endpoint without changing this guide’s deployment pattern.
What stays constant across versions:
- Pin the image to control when you upgrade.
- Use a named volume, not a bind-mount, for the
/datafolder. - Mount the socket read-only.
- Put a TLS reverse proxy in front for production.