How to install Komodo with Docker and manage several hosts
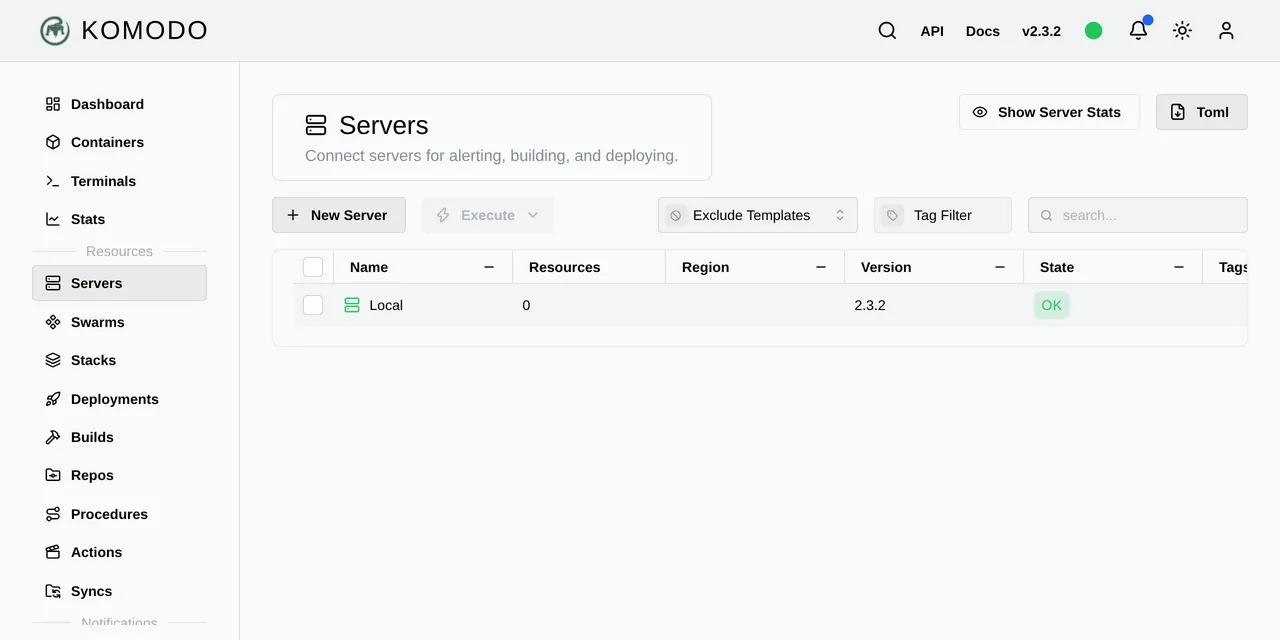
Table of contents
- Key takeaways
- What Komodo is, and how it differs from the Portainer agent
- Which database to choose
- Installing Komodo Core with Docker Compose
- What the first startup looks like
- Adding a second host with the Periphery agent
- Deploying a stack from a Git repository
- OIDC login and group-based permissions
- What each option costs you
- Frequently asked questions
- Do I need to open ports on the second server?
- Can I use PostgreSQL instead of MongoDB?
- Does Komodo work with a Swarm cluster?
- Conclusion
- Sources
You have containers spread over two or three machines and no console that sees all of them without charging per node. Komodo solves that with a central server and one agent per machine, and it does not charge for connected servers. This guide installs Komodo from the official compose file, adds a second host, and deploys a stack straight from a Git repository.
Key takeaways
- Komodo has two pieces: Core, which serves the UI and the API on port 9120, and Periphery, a small stateless agent on every managed machine.
- Since version 2.0 the agent can open the connection to Core itself over a websocket, so the second host needs no inbound port at all.
- A database is mandatory: MongoDB is the recommended one, and FerretDB over PostgreSQL is the official alternative for systems that cannot run recent MongoDB.
- Core and Periphery authenticate with self-generated key pairs and automatic rotation; the agent private key never leaves the server.
- The free version caps nothing: no server limit, no build limit, and OIDC login with group-based permissions included.
What Komodo is, and how it differs from the Portainer agent
Komodo describes itself in its own documentation as a web application for managing servers, builds, deployments and automated procedures. It is written in Rust, ships under GPL-3.0, and the repository, opened in March 2022, has 12,120 stars and 398 forks as of late August 2026.
The architecture has two pieces. Core is the web server: it keeps configuration in the database, serves the UI and exposes the API. Periphery is a small binary running on every managed machine that executes whatever Core asks for and reports CPU, memory and disk usage.
So far this sounds like what the Portainer agent already does, but two differences change the deployment. The first is the direction of the connection: since version 2.0, released on 24 March 2026, Periphery can open the connection to Core itself, so the remote host exposes nothing. The second is scope: Komodo does not only manage containers, it also builds images, clones repositories, runs chained procedures and syncs your whole configuration from versioned TOML files.
Which database to choose
Komodo needs its own database, and that is where the single-container simplicity ends. The documentation is explicit about which one to use: "MongoDB is the recommended database for Komodo. It stores all resource configuration, user accounts, audit logs, and system state". The official compose file starts it with --wiredTigerCacheSizeGB 0.25, capping the cache at 256 MB so it does not eat the machine.
The official alternative is FerretDB, an adapter that speaks the MongoDB protocol on top of PostgreSQL. It exists for a concrete reason: some systems cannot run recent MongoDB releases, for example when the processor has no AVX instructions. If your server starts MongoDB without complaining, stay on MongoDB; if not, the FerretDB compose file brings up ghcr.io/ferretdb/postgres-documentdb and ghcr.io/ferretdb/ferretdb in front, and Core notices no difference.
| Option | When to pick it | Extra containers |
|---|---|---|
| MongoDB | The normal case; the project recommends it | 1 |
| FerretDB over PostgreSQL | Processors without AVX, or a no-MongoDB policy | 2 |
The FerretDB files carry a warning in capitals from the project itself: pin a specific image version, because updates can break compatibility.
Installing Komodo Core with Docker Compose
The project publishes the compose file and the variables file separately, so installation means downloading both, editing the variables and bringing the stack up:
- Download the two official files into a
komododirectory. - Edit
komodo/compose.envand change the passwords and both secrets. - Bring the stack up with the project named
komodo. - Open
http://<your-server>:9120and log in as the initial admin user.
The download uses the repository paths:
wget -P komodo https://raw.githubusercontent.com/moghtech/komodo/main/compose/mongo.compose.yaml &&
  wget -P komodo https://raw.githubusercontent.com/moghtech/komodo/main/compose/compose.env
Before starting anything, open komodo/compose.env. It ships four example values that must be changed without exception, because the file is written so the install works, not so it is safe:
## Database credentials
KOMODO_DATABASE_USERNAME=admin
KOMODO_DATABASE_PASSWORD=admin

## Admin user created on first startup
KOMODO_INIT_ADMIN_USERNAME=admin
KOMODO_INIT_ADMIN_PASSWORD=changeme

## Signing secrets
KOMODO_WEBHOOK_SECRET=a_random_secret
KOMODO_JWT_SECRET=a_random_jwt_secret

## Public URL, the one browsers and the OIDC provider will see
KOMODO_HOST=https://example.komodo.com
The admin password deserves a second look: the configuration Core prints at startup includes min_password_length: 1, so nothing stops you setting a single letter. Raise everything else from the UI afterwards.
With the variables ready, deployment is one command:
docker compose -p komodo -f komodo/mongo.compose.yaml
  --env-file komodo/compose.env up -d
That compose file starts three containers: MongoDB, Core with port 9120 published, and a Periphery instance to manage the machine Komodo itself lives on.
What the first startup looks like
I deployed this stack on an arm64 machine to write the article, and the Core log tells the story better than any description. These are the lines that matter:
INFO CoreStartup: Komodo Core version: v2.3.2
INFO CoreStartup: Writing private key to "/config/keys/core.key"
INFO CoreStartup: Public Key: MCowBQYDK2VuAyEAUrWvi4QRI5idzuDraZJinZegSXFn+RfI6NeotT+3Z10=
INFO CoreStartup: Creating init admin user...
INFO Server starting on http://[::]:9120
Core generates its key pair on first startup and creates the admin user you declared in the variables. The agent does the same and then logs the detail that defines version 2:
INFO PeripheryStartup: Komodo Periphery version: v2.3.2
INFO StartCoreConnection: Initiating outbound connection to ws://core:9120/ws/periphery?server=Local
WARN Failed to connect to websocket | Connection refused (os error 111)
INFO Logged in to Komodo Core core:9120 websocket as Server Local
That refused-connection warning is normal: the agent starts before Core opens the port and retries five seconds later. The connection leaves the agent towards the server, not the other way round.
Idle, with one connected server and no resources defined, measured usage was 53.2 MiB for Core, 6.8 MiB for Periphery and 132.7 MiB for MongoDB. Under 200 MiB in total, which for a management tool is reasonable. The arm64 images are not small: 979 MB for Core and 649 MB for the agent.
Adding a second host with the Periphery agent
This is why you install Komodo instead of something simpler. Connecting another machine takes three steps according to the documentation: create an onboarding key from the UI, install the agent passing it that key, and confirm the server state turns to OK.
The onboarding key lives in Settings, Onboarding tab, and starts with O-. With it in hand, the project recommends installing the agent as a systemd service rather than inside a container. The binary needs to see host processes and the compose file paths exactly as they sit on disk:
curl -sSL https://raw.githubusercontent.com/moghtech/komodo/main/scripts/setup-periphery.py
  | python3 -
  --core-address="https://komodo.example.com"
  --connect-as="$(hostname)"
  --onboarding-key="O-..."
Then keep it alive across reboots with sudo systemctl enable periphery. The configuration file goes to /etc/komodo/periphery.config.toml for a root install, or $HOME/.config/komodo/periphery.config.toml for a user install.
What happens underneath is the interesting part. The onboarding key is used exactly once: on the first connection the agent generates its own key pair and sends Core only the public half. From then on all communication is authenticated with a cryptographic handshake from the Noise framework[1], checking that the transferred public key matches. The agent private key never leaves that machine, and auto_rotate_keys defaults to on, so Komodo can renew the key pairs of every server on request.
If you would rather run the container, the agent compose file exists and the variable that matters is PERIPHERY_CORE_ADDRESS. And if your network forces the classic model, Core can also dial out to the agent: in that case Periphery listens on port 8120 and you will have to open it.
One constraint catches a lot of people out: every compose file and every repository must live under root_directory, which defaults to /etc/komodo. That path has to match inside and outside the container if you run the agent containerised. When they differ, Docker gets confused.
Deploying a stack from a Git repository
A Stack in Komodo is a docker compose deployment. It accepts three ways of supplying the file: write it in the UI, point at files already on the server, or clone a Git repository. The third one justifies the tool, and the documentation puts it plainly: "Komodo clones the repo onto the host to deploy. Changes are tracked in git and you can use webhooks to auto-redeploy on push".

The configuration asks for the target server, the Git account, the repository in owner/repo form and the branch. Git accounts and image registries are declared in Settings, under the providers tab, or in the Core configuration file:
[[git_provider]]
domain = "github.com"
https = true
accounts = [{ username = "my-user", token = "ghp_xxxxxxxxxxxx" }]

[[image_registry]]
domain = "docker.io"
accounts = [{ username = "my-user", token = "dckr_pat_xxxxxxxxxxxx" }]
Tokens declared in the file do show up in the UI afterwards, but they cannot be read back through the API or the screen. Beyond the webhook, every stack has two update settings worth understanding before you switch them on. One watches for newer images and lights an indicator; the other redeploys on its own when a new digest appears.
OIDC login and group-based permissions
Komodo accepts username and password, GitHub, Google and any generic OIDC provider. Configuration comes down to five variables, and if your provider implements PKCE you can omit the secret:
KOMODO_OIDC_ENABLED=true
KOMODO_OIDC_PROVIDER=https://sso.example.com/application/o/komodo
KOMODO_OIDC_CLIENT_ID=komodo
KOMODO_OIDC_CLIENT_SECRET=...
KOMODO_DISABLE_USER_REGISTRATION=true
If you already run Authentik as your identity provider, the integration is the usual one: create the application and copy the client id and secret. From version 2.2 you can turn on the automatic redirect so the password screen never appears.
Permissions are granted through groups, and the documentation recommends that over assigning them user by user: a user can belong to more than one group and inherits whatever each group holds. There are four levels, forming a ladder:
- None: the user neither sees the resource in the UI nor gets it back when querying the API directly.
- Read: sees it and can review the configuration, changing nothing.
- Execute: triggers actions such as build or redeploy, but cannot change configuration.
- Write: full access, deletion of the resource included.
On top of that sit specific permissions granted separately, such as access to logs, inspection, the terminal or server processes. And if you want the door shut entirely, the agent accepts PERIPHERY_DISABLE_TERMINALS=true so shell access does not exist regardless of who holds the permission.
What each option costs you
The arithmetic is the easy part of this comparison. Portainer Business Edition is free forever for up to three nodes, and beyond that the Starter plan begins at 105 dollars a month. Komodo puts it in writing on the front page of its documentation: "There is no limit to the number of servers you can connect, and there never will be".
| Komodo v2.3.2 | Portainer | |
|---|---|---|
| Free servers | No limit | 3 on the business edition |
| Connection direction | Agent dials the server, or the reverse | Server dials the agent |
| Separate database | Yes, MongoDB or FerretDB | No |
| Image builds | Included | No |
| Declarative configuration | Versioned TOML files | Partial |
| Learning curve | Steep | Gentle |
Where Komodo loses is everywhere else. It is two binaries plus a database, and there are nine resource types to understand before you feel comfortable. The community is a fraction of Portainer’s, with everything that implies when you are hunting a specific error message at eleven at night. If all you want is to restart containers from your phone, this is far too much machinery.
Frequently asked questions
Do I need to open ports on the second server?
No, if you use the outbound mode. Since version 2.0 the agent opens the connection to Core over a websocket, so the remote machine only has to reach your Komodo server. Port 8120 is needed only in the classic mode, when Core dials the agent.
Can I use PostgreSQL instead of MongoDB?
Yes, with the FerretDB compose file, which translates the MongoDB protocol onto PostgreSQL. The project offers it mainly for machines where recent MongoDB will not start. If MongoDB works on your server, it is the recommended option.
Does Komodo work with a Swarm cluster?
Yes, since version 2.0. You connect the manager nodes and administer cluster nodes, services, stacks, configs and secrets from there. If you are still sorting out the networking side, having Traefik already settled helps.
Conclusion
Installing Komodo is two files and one compose command; the time goes into understanding it. What you buy with that curve is a console that does not charge per server, deploys from Git on a webhook, builds images, and keeps the whole configuration in versioned TOML. Coming from Portainer with two machines, you probably do not need it. With six, the numbers start to work.
The full three-way comparison is in Komodo versus Portainer and Dockge, and the Spanish version of this guide is at Cómo instalar Komodo con Docker.
Sources: [1] Komodo, what Komodo is[2], [2] moghtech/komodo, project repository[3], [3] Komodo, setup with MongoDB[4], [4] Komodo, connect more servers[5], [5] Komodo, permissioning and groups[6], [6] Portainer, pricing and free nodes[7], [7] The Noise Protocol Framework[1].
Sources
Source code
Access all the source code for this post on GitHub.
View on GitHub