How to Install Prometheus with Docker
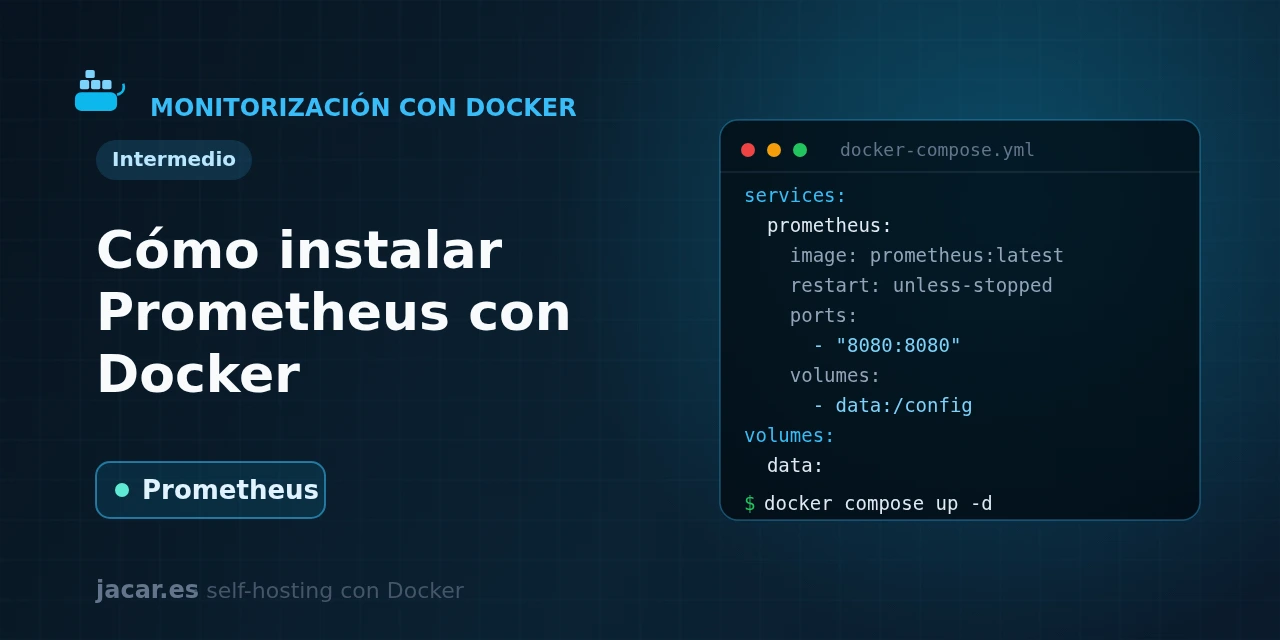
Table of contents
- Key takeaways
- What is Prometheus and how does the pull model work?
- What does the docker-compose.yml for Prometheus look like?
- How do you define targets and the scrape_interval?
- How do you run basic PromQL queries?
- How do you prepare the Grafana integration?
- Frequently asked questions
- Why should I not use the Prometheus latest tag?
- How many resources does Prometheus use?
- Does Prometheus keep the data if I delete the container?
- Conclusion
- Sources
Prometheus is the de facto standard for monitoring servers and containers, and with Docker you have it collecting metrics in a few minutes. In this guide you bring up Prometheus with a single docker-compose.yml file and write its configuration in prometheus.yml. You define the targets you want to watch, tune the scrape interval, run your first PromQL queries and leave everything ready to chart in Grafana. The same explanation is available in Spanish.
Key takeaways
- Prometheus is a graduated CNCF project (the second to graduate, after Kubernetes, in August 2018) and today it is the foundation of almost any self-hosted observability stack.
- The most recent stable version is Prometheus 3.13.1, released on 10 July 2026; the 3.13 branch is the long-term support (LTS) line.
- The
:latesttag is rewritten with every release (today it happens to match 3.13.1), so it gives you zero reproducibility: pin a specific version such asprom/prometheus:v3.13.1instead. - Prometheus uses a pull model: it is Prometheus that goes and fetches metrics from each target’s
/metricsHTTP endpoint, at the interval you define (scrape_interval). - The web UI and the API listen on port 9090, and the data is stored in a local time-series database with a default retention of 15 days.
What is Prometheus and how does the pull model work?
Prometheus is an open-source monitoring and alerting system created at SoundCloud in 2012 and later donated to the Cloud Native Computing Foundation. Its job is to collect numeric metrics over time (CPU usage, free memory, requests per second, latency) and store them as time series, that is, sequences of values with their timestamp. On top of that data you can run queries, define alerts and build dashboards.
The key difference from other systems is the pull model. Instead of each application sending its metrics to a central server (push model), it is Prometheus that goes and fetches them. At every scrape interval it makes an HTTP request to a /metrics endpoint on each target and downloads the current state.
As the official documentation puts it, "Prometheus collects metrics from targets by scraping HTTP endpoints". That approach greatly simplifies service discovery and makes it obvious whether a target is down: if it does not answer the scrape, the internal up metric is 0.
Prometheus rarely works alone. It collects and stores, but operating-system metrics are exposed by a Node Exporter and container metrics by a cAdvisor, and the nice visualisation comes from Grafana. Prometheus is the heart that orchestrates the collection.
What does the docker-compose.yml for Prometheus look like?
You need two files in the same folder: the Prometheus configuration (prometheus.yml) and the docker-compose.yml that starts the container and mounts that configuration. Start with the minimal configuration:
global:
  scrape_interval: 15s
  scrape_timeout: 10s
  evaluation_interval: 15s

scrape_configs:
  - job_name: prometheus
    static_configs:
      - targets: ["localhost:9090"]

  - job_name: node
    static_configs:
      - targets: ["node-exporter:9100"]
And now the docker-compose.yml, which pins the version, mounts the previous file read-only, persists the data in a named volume and publishes the port only locally:
services:
  prometheus:
    image: prom/prometheus:v3.13.1
    restart: unless-stopped
    command:
      - "--config.file=/etc/prometheus/prometheus.yml"
      - "--storage.tsdb.path=/prometheus"
      - "--storage.tsdb.retention.time=30d"
      - "--web.enable-lifecycle"
    volumes:
      - ./prometheus.yml:/etc/prometheus/prometheus.yml:ro
      - prom_data:/prometheus
    ports:
      - "127.0.0.1:9090:9090"
    healthcheck:
      test: ["CMD", "wget", "-q", "--spider", "http://localhost:9090/-/healthy"]
      interval: 15s
      timeout: 5s
      retries: 5

volumes:
  prom_data:
Four details are worth pausing on. The named volume prom_data is mounted at /prometheus, where Prometheus keeps its time-series database (TSDB). If you would rather understand the difference between a named volume and a bind mount, we explain it in the guide on Docker volumes and bind mounts. The --storage.tsdb.retention.time=30d option raises retention from the default 15 days to 30.
The --web.enable-lifecycle flag lets you reload the configuration without restarting. And by publishing the port as 127.0.0.1:9090:9090 you keep the UI reachable only from the machine itself, because Prometheus ships with no authentication. Exposing it on the Internet without a proxy in front is a risk.
With both files ready, start the stack and check the status:
docker compose up -d
docker compose ps
docker compose logs -f prometheus
Open http://127.0.0.1:9090 in the browser and you will see the Prometheus UI. Under Status > Targets you get the configured targets and whether they are UP or DOWN.
How do you define targets and the scrape_interval?
The global block sets the default behaviour. The scrape_interval is the gap between two fetches of the metrics. A value of 15 seconds is balanced for a home server, while large environments tend to raise it to 30 or 60 seconds to reduce load and storage. The scrape_timeout is how long it waits before giving a scrape up as failed, and the evaluation_interval the gap between two evaluations of the alerting rules.
Each scrape_configs entry is a job with a name and a list of targets. In the example, the prometheus job monitors itself at localhost:9090, and the node job points to node-exporter:9100, using the service name as the host. Inside the Compose network, Docker’s internal DNS resolves node-exporter to the container’s IP, without publishing that port externally. For that exporter to exist, you have to add it to the same stack, something we cover in host and container metrics with Node Exporter and cAdvisor.
You can set a different interval per job when a target needs more resolution (for example, cAdvisor every 5 seconds):
  - job_name: cadvisor
    scrape_interval: 5s
    static_configs:
      - targets: ["cadvisor:8080"]
Every time you edit prometheus.yml, validate the syntax and reload it live, without restarting the container, thanks to the lifecycle flag:
docker compose exec prometheus promtool check config /etc/prometheus/prometheus.yml
curl -X POST http://127.0.0.1:9090/-/reload
How do you run basic PromQL queries?
PromQL (Prometheus Query Language) is the language you use to interrogate the time series. On the Graph tab of the UI you can write expressions and see the result as a table or a chart. The simplest query is to type the name of a metric; for example, up returns 1 or 0 for each target, depending on whether it is alive or down.
Most useful metrics are counters that only go up, so they are rarely queried raw: you apply the rate() function, which computes the per-second increase over a time window. A couple of common examples:
up

rate(node_cpu_seconds_total{mode="idle"}[5m])

100 - (avg by (instance) (rate(node_cpu_seconds_total{mode="idle"}[5m])) * 100)
The first says which targets are active. The second computes, per core, how many seconds per second the CPU spends idle over the last 5 minutes. The third is the classic trick to get the CPU usage percentage per machine: it averages the idle time and subtracts it from 100. The braces {...} filter by labels and by (instance) groups the result; with these three pieces (selection, label filter, and rate and aggregation functions) you cover 90% of day-to-day queries.
How do you prepare the Grafana integration?
Prometheus includes its own web UI, completely revamped in Prometheus 3.0 (released on 14 November 2024, the first major version jump in about seven years). For real dashboards the usual tool is Grafana. The integration: in Grafana you add a data source of type Prometheus and give it the URL http://prometheus:9090, again using the service name inside the Compose network.
From there, in Grafana you can write the same PromQL queries or, more conveniently, import ready-made dashboards by their identifier (for example, the popular Node Exporter panel has ID 1860). The step by step for that part is in the guide on how to install Grafana with Docker. And when you want to publish Grafana or Prometheus itself with HTTPS and a domain, put a reverse proxy in front as explained in how to install Traefik with Docker Compose.
Frequently asked questions
Why should I not use the Prometheus latest tag?
Because :latest is a moving target: Docker Hub rewrites it every time a new stable release ships, so docker compose pull can silently hand you a different major version months from now, config flags and all. Always pin a specific version such as prom/prometheus:v3.13.1 in your compose file, verify the current tags on Docker Hub[1] before upgrading, and decide yourself when to move to the next one.
How many resources does Prometheus use?
Very few for a home server. At idle, with a handful of targets, it sits around 100 to 200 MB of RAM, and consumption grows with cardinality, that is, with the number of distinct combinations of metric and labels. Disk space depends on retention: by default it keeps 15 days of data, and you can adjust it with --storage.tsdb.retention.time. For a homelab with Node Exporter and cAdvisor, a few gigabytes are enough.
Does Prometheus keep the data if I delete the container?
Yes, as long as you use a named volume like in this guide. The container is ephemeral, but the prom_data volume survives docker compose down and is mounted again when you recreate the service. You would only lose the time series if you run docker compose down -v, which also removes volumes. Even so, Prometheus is meant as a short-term metrics store, not a backup: for long-term retention you use systems such as Thanos or Mimir.
Conclusion
With a docker-compose.yml and a prometheus.yml you have a persistent Prometheus server, collecting metrics through its pull model, with the UI and API on port 9090 and a healthcheck that confirms it is healthy. It is the central piece of your observability: add a Node Exporter and a cAdvisor to feed it, connect Grafana for the dashboards and protect it behind a reverse proxy before exposing it. From here, every new service in your infrastructure is one more target to watch.
Sources: [1] Official Prometheus documentation[2], [2] Official prom/prometheus image on Docker Hub[3], [3] Prometheus repository on GitHub[4], [4] Prometheus release cycle and LTS (endoflife.date)[5].