How to Install Nginx Proxy Manager with Docker
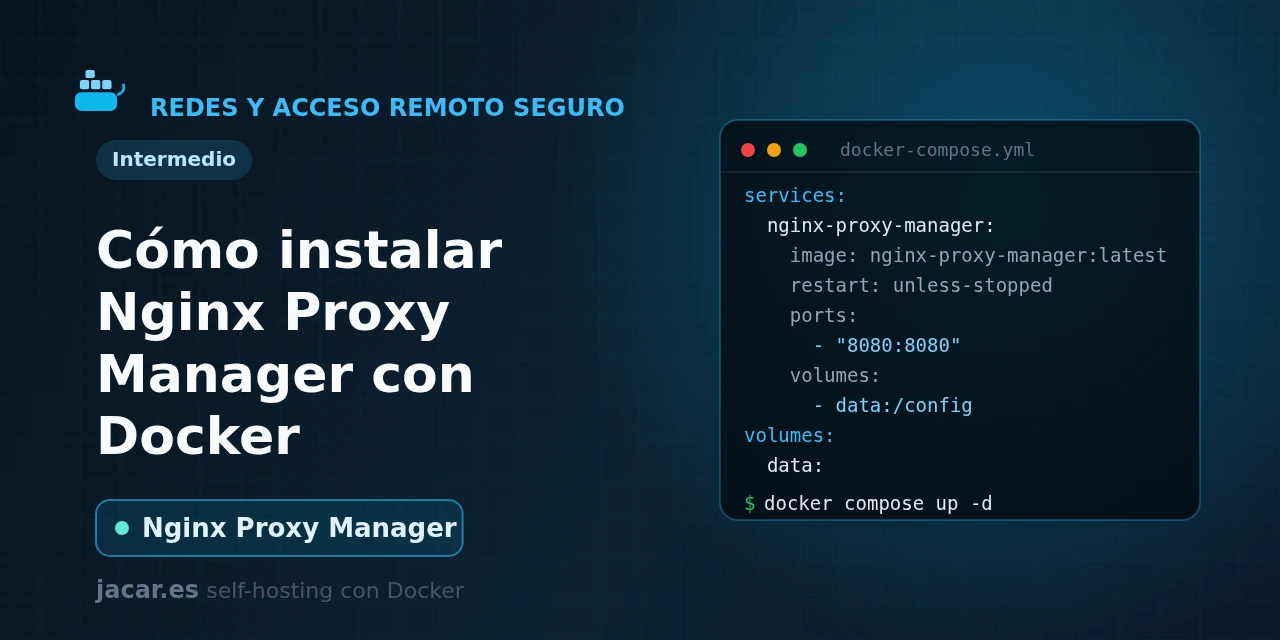
Table of contents
- Key takeaways
- What is Nginx Proxy Manager?
- What does the docker-compose.yml with a database look like?
- What is the first login and default password?
- How do you create a proxy host with a Let's Encrypt SSL?
- NPM or Traefik: when to pick each one?
- Frequently asked questions
- Does Nginx Proxy Manager need a separate database?
- Can I use Nginx Proxy Manager if port 80 is already taken?
- Is it safe to expose the admin panel to the Internet?
- Conclusion
- Sources
Nginx Proxy Manager (NPM, a web panel for managing Nginx reverse-proxy hosts) puts a web interface over Nginx and Certbot. With it you can publish your services over HTTPS without editing a single config file.
In this guide you bring it up with a single docker-compose.yml alongside its database and log in for the first time with the default password. Then you create a proxy host with a Let’s Encrypt certificate in a few clicks and compare it with Traefik to know when each one fits. The same explanation is available in Spanish.
Key takeaways
- Nginx Proxy Manager (NPM) is an open-source reverse proxy (MIT licence) that describes itself as "a Docker container for managing Nginx proxy hosts with a simple, powerful interface", with more than 33,000 stars on GitHub.
- Under the hood it uses OpenResty (Nginx with Lua) and Certbot, so it handles Let’s Encrypt certificates and their automatic renewal without you touching the command line.
- It publishes three ports: 80 for HTTP, 443 for HTTPS and 81 for its web admin panel.
- The first login always uses the default credentials
admin@example.com/changeme, and NPM forces you to change them the moment you get in. - Pin a specific image version such as
jc21/nginx-proxy-manager:2.15.1(the current stable, released on 3 June 2026) instead of:latest; that way you decide when you move up a version.
What is Nginx Proxy Manager?
Nginx Proxy Manager is a web administration layer built on top of Nginx. With it you expose your internal services through a single entry point, each with its own domain and TLS certificate. Instead of writing server { ... } blocks by hand and running Certbot from the terminal, you define everything from a panel: which domain points to which container, on which port and with which certificate. It is a popular first gateway for people starting out in self-hosting, precisely because it hides Nginx’s complexity behind simple forms.
Inside, NPM bundles OpenResty (an Nginx distribution with the Lua interpreter built in) and Certbot, the official Let’s Encrypt client. When you create a proxy host and request a certificate, NPM generates the Nginx configuration file, runs the Let’s Encrypt validation challenge and reloads the server for you. The configuration lives in a database and the certificates in the /etc/letsencrypt volume, so they survive container restarts and updates.
The project is community-maintained under the MIT licence and has more than 33,000 stars on GitHub, which gives a sense of its popularity in the homelab world. If you are coming from other guides in this series, NPM is the natural next step. It safely takes services like Vaultwarden, or any panel you have set up, out to the Internet without exposing odd ports.
What does the docker-compose.yml with a database look like?
First of all you need a Linux machine with Docker and the Compose plugin; if you do not have them yet, follow the guide to install Docker on Ubuntu 24.04 first. NPM can run with an embedded SQLite database (the simplest option), but for a serious deployment it is better to use MariaDB in a separate container, which is what we do here. Create a folder for the project and save this docker-compose.yml inside it:
services:
  app:
    image: jc21/nginx-proxy-manager:2.15.1
    container_name: npm
    restart: unless-stopped
    ports:
      - "80:80"
      - "443:443"
      - "81:81"
    environment:
      DB_MYSQL_HOST: db
      DB_MYSQL_PORT: 3306
      DB_MYSQL_USER: npm
      DB_MYSQL_PASSWORD: change_this_password
      DB_MYSQL_NAME: npm
    volumes:
      - npm_data:/data
      - npm_letsencrypt:/etc/letsencrypt
    depends_on:
      db:
        condition: service_healthy
    healthcheck:
      test: ["CMD", "/usr/bin/check-health"]
      interval: 30s
      timeout: 5s
      retries: 5

  db:
    image: mariadb:11.8
    container_name: npm-db
    restart: unless-stopped
    environment:
      MARIADB_ROOT_PASSWORD: change_this_root_password
      MARIADB_DATABASE: npm
      MARIADB_USER: npm
      MARIADB_PASSWORD: change_this_password
    volumes:
      - npm_db:/var/lib/mysql
    healthcheck:
      test: ["CMD", "healthcheck.sh", "--connect", "--innodb_initialized"]
      interval: 30s
      timeout: 5s
      retries: 5

volumes:
  npm_data:
  npm_letsencrypt:
  npm_db:
Go over the important details. The app service is NPM: it publishes 80 and 443 for real traffic and 81 for the panel. The DB_MYSQL_* variables tell it how to connect to MariaDB, whose credentials must match the MARIADB_* ones on the db service.
Change change_this_password and change_this_root_password for real passwords; if you would rather not write them in the file, read them from environment variables and secrets. The npm_data and npm_letsencrypt volumes store the configuration and the certificates, and npm_db the database data. The depends_on with condition: service_healthy stops NPM from starting before MariaDB is ready, a pattern you can review in the guide to installing MariaDB with Docker.
With the file ready, start the stack in the background and watch the logs:
mkdir nginx-proxy-manager
cd nginx-proxy-manager
docker compose up -d
docker compose ps
docker compose logs -f app
The first time, NPM takes a couple of minutes to build its initial configuration. When the container shows as healthy, the panel will be ready on port 81.
What is the first login and default password?
Open http://192.168.1.10:81 in the browser (replace the IP with your server’s). NPM always creates an administrator user with the default credentials admin@example.com as the email and changeme as the password. Enter them and, as soon as you are in, the application immediately asks you to fill in your real name and email and to set a new password. Those default credentials only work for the first login: you cannot leave them in place.
This first step is also the one that causes the most trouble. If the form rejects admin@example.com / changeme, it is almost always because the container did not finish booting or because it could not reach the database; check docker compose logs -f app for MariaDB connection errors. Once inside and with the password changed, the panel shows four sections: proxy hosts, access lists, SSL certificates and users. From here on you never touch the terminal again for day-to-day work.
How do you create a proxy host with a Let’s Encrypt SSL?
Say you have a web service listening in another container, for example a panel at http://192.168.1.10:9000, and a domain panel.mydomain.com whose DNS record points to your server’s public IP. To publish it over HTTPS, go to Hosts and click Add Proxy Host. On the Details tab type the domain (panel.mydomain.com), set the target (Forward Hostname with the IP or container name and Forward Port with 9000) and enable Block Common Exploits.
The certificate is requested on the SSL tab. Expand SSL Certificate, choose Request a new SSL Certificate, tick Force SSL and HTTP/2 Support, accept the Let’s Encrypt terms and save. NPM runs the validation challenge, obtains the certificate and reloads Nginx in a few seconds; from that moment https://panel.mydomain.com answers with a padlock and renews itself every 90 days.
For the validation to work, ports 80 and 443 on your router must be forwarded to the server, because Let’s Encrypt needs to reach the domain from outside. If the target service runs in Docker, connect it to the same network as NPM and use the container name instead of the IP. That way you do not depend on ports published on the host.
NPM or Traefik: when to pick each one?
Nginx Proxy Manager and Traefik solve the same problem (a reverse proxy with automatic TLS), but with opposite philosophies. NPM is a GUI-first tool: you configure each host from the browser, save to a database and see the certificates in a table. Traefik, in contrast, is configuration as code: it discovers containers on its own, reading labels in the docker-compose.yml itself, with no writable panel and no database.
- Pick NPM if you are starting out, if you prefer clicking buttons to writing YAML, or if you manage a handful of domains that change now and then. Its learning curve is minimal and in five minutes you have your first HTTPS.
- Pick Traefik if you automate your infrastructure, if your containers change with every deploy, or if you want everything to live in the repository (GitOps). Traefik reconfigures the routes instantly when a container starts with the right labels, without going through any interface.
The key difference is state: in NPM the source of truth is its database, which you have to back up; in Traefik it is your docker-compose.yml, versioned in Git. They are not mutually exclusive: you can start with NPM for convenience and move to Traefik once your homelab grows and the manual clicking starts to get in the way.
Frequently asked questions
Does Nginx Proxy Manager need a separate database?
It is not mandatory. NPM can use an embedded SQLite database, and in fact that is what it ships with if you do not pass the DB_MYSQL_* variables: in that case you only need to mount the /data volume. The MariaDB option, the one this guide shows, is preferable for large installs or ones with a growing catalogue of hosts. A client-server database performs better under load and is backed up with the usual tools, but to get started SQLite is perfectly valid.
Can I use Nginx Proxy Manager if port 80 is already taken?
Port 80 has to be free on the host, because Let’s Encrypt uses it to validate domains through the HTTP method. If another service occupies it, you have two paths. You can stop that service and put it behind NPM itself, or switch to DNS validation, which NPM also supports for compatible providers and does not need port 80 open. The panel’s port 81, on the other hand, you can change without any problem in the ports section.
Is it safe to expose the admin panel to the Internet?
It is not advisable. Port 81 gives full access to the proxy configuration, so the recommendation is to keep it reachable only from your local network or through a VPN. If you need to manage it from outside, put it behind an NPM proxy host yourself, with HTTPS and an access list (basic authentication), instead of publishing 81 as is. The same caution applies to any service with no login of its own.
Conclusion
With a single docker-compose.yml and its database you have a complete reverse proxy you can manage from the browser. You publish services over HTTPS, request Let’s Encrypt certificates in a few clicks and forget about editing Nginx by hand. Remember to pin the image version, change the default password on the first login and not expose port 81 to the Internet. The logical next step is to put your sensitive services, such as Vaultwarden, behind NPM, and, when your homelab grows, to weigh moving to Traefik to manage it all as code.
Sources
Source code
Access all the source code for this post on GitHub.
View on GitHub